Pholcus Tank Knit-A-Long Part 3: Joining in the Round, Lots of Stockinette, and Finishing Touches
Part 3 here we go! This part probably takes about as long to complete as Part 2, but it may take a bit longer if you choose to make your top longer. By the end, you’ll have a beautiful finished piece to wear.
The only new skills you need for this part of the pattern are slip-slip-knit (to create a left-leaning decrease) and knit 2 together (to create a right-leaning decrease). If you’re unsure about these skills, there are tons of great online tutorials.
You also have the option to also use kitchener stitch to graft your straps together at the end, but you can also simply sew them together - there are so few stitches, it really is not very noticeable if you don’t use the kitchener stitch.
The Pattern
Pattern notes.
Required techniques and abbreviations:
Knit (K)
Purl (P)
Slip-slip-knit (SSK)
Knit 2 together (K2tog)
Right side (RS) - the side of your work that will face out
Wrong side (WS) - the side of your work that will face in
Stitch/stitches (st/sts)
Gauge: 20 stitches and 31 rows to 4” (10 cm), or use your custom gauge!
Size notation: XS (S, M, L, XL) (2X, 3X, 4X, 5X)
Actual bust measurements for size notation:
28” (32”, 36”, 40”, 44”) (48”, 52”, 56”, 60”)
71 cm (81, 91, 101, 111) (122, 132, 142, 152)
Ease: 4” (10 cm) will be ADDED to each of the sizes above for a finished piece with a bust measurement 4” (10 cm) larger than the actual bust measurement indicated.
Joining in the round.
Setup: take the 4 panels you knit during Part 2. Make sure they are all RS out, ready to be worked across the RS. You will start where you left off on panel 4.
Round 1 (RS): SSK, k until 2 sts remain on panel 1, k2tog. *Do not break yarn. Continue on to the next panel: SSK, k until 2 sts remain on panel, k2tog.* Repeat the portion within * * until you reach the end of your final panel.
At the end of round 1, join your piece by simply continuing to knit from the end of panel 4 to the beginning of panel 1. Be careful to make sure your piece is not twisted.
Don’t want to knit in the round? You can join 2 panels (instead of 4) to create a front and back to your piece. If you use this method, you’ll just need to make sure you do the following:
Keep track of your rows - you want to make sure you knit the same number of rows on the front and the back!
Continue to K on the RS and P on the WS of your work.
Seam your pieces at the end.
Note: you may wish to create some sort of edging at the bottom of each piece to prevent your work from curling - seams don’t always look very pretty when your work curls and shows the inside.
Continue knitting in the round until the piece reaches your desired length. This will vary depending on your preferences, as well as your size. I highly recommend trying your top on as you go to get an idea of how long you want to knit. If you knit the piece as written, remember that your hem will curl a little bit, so be sure to knit a bit longer than you prefer to account for the edge curling.
Don’t want your piece to curl? Consider adding edging. The basic pattern I present here simply binds off in the round, and it results in a curled edge as pictured. If you don’t want your edge to curl, you can use one of the following stitches for the bottom few inches of your piece: seed stitch, ribbing, garter stitch, lace.
Once your piece is long enough, bind off, break yarn, and secure your tail.
Sewing in ends.
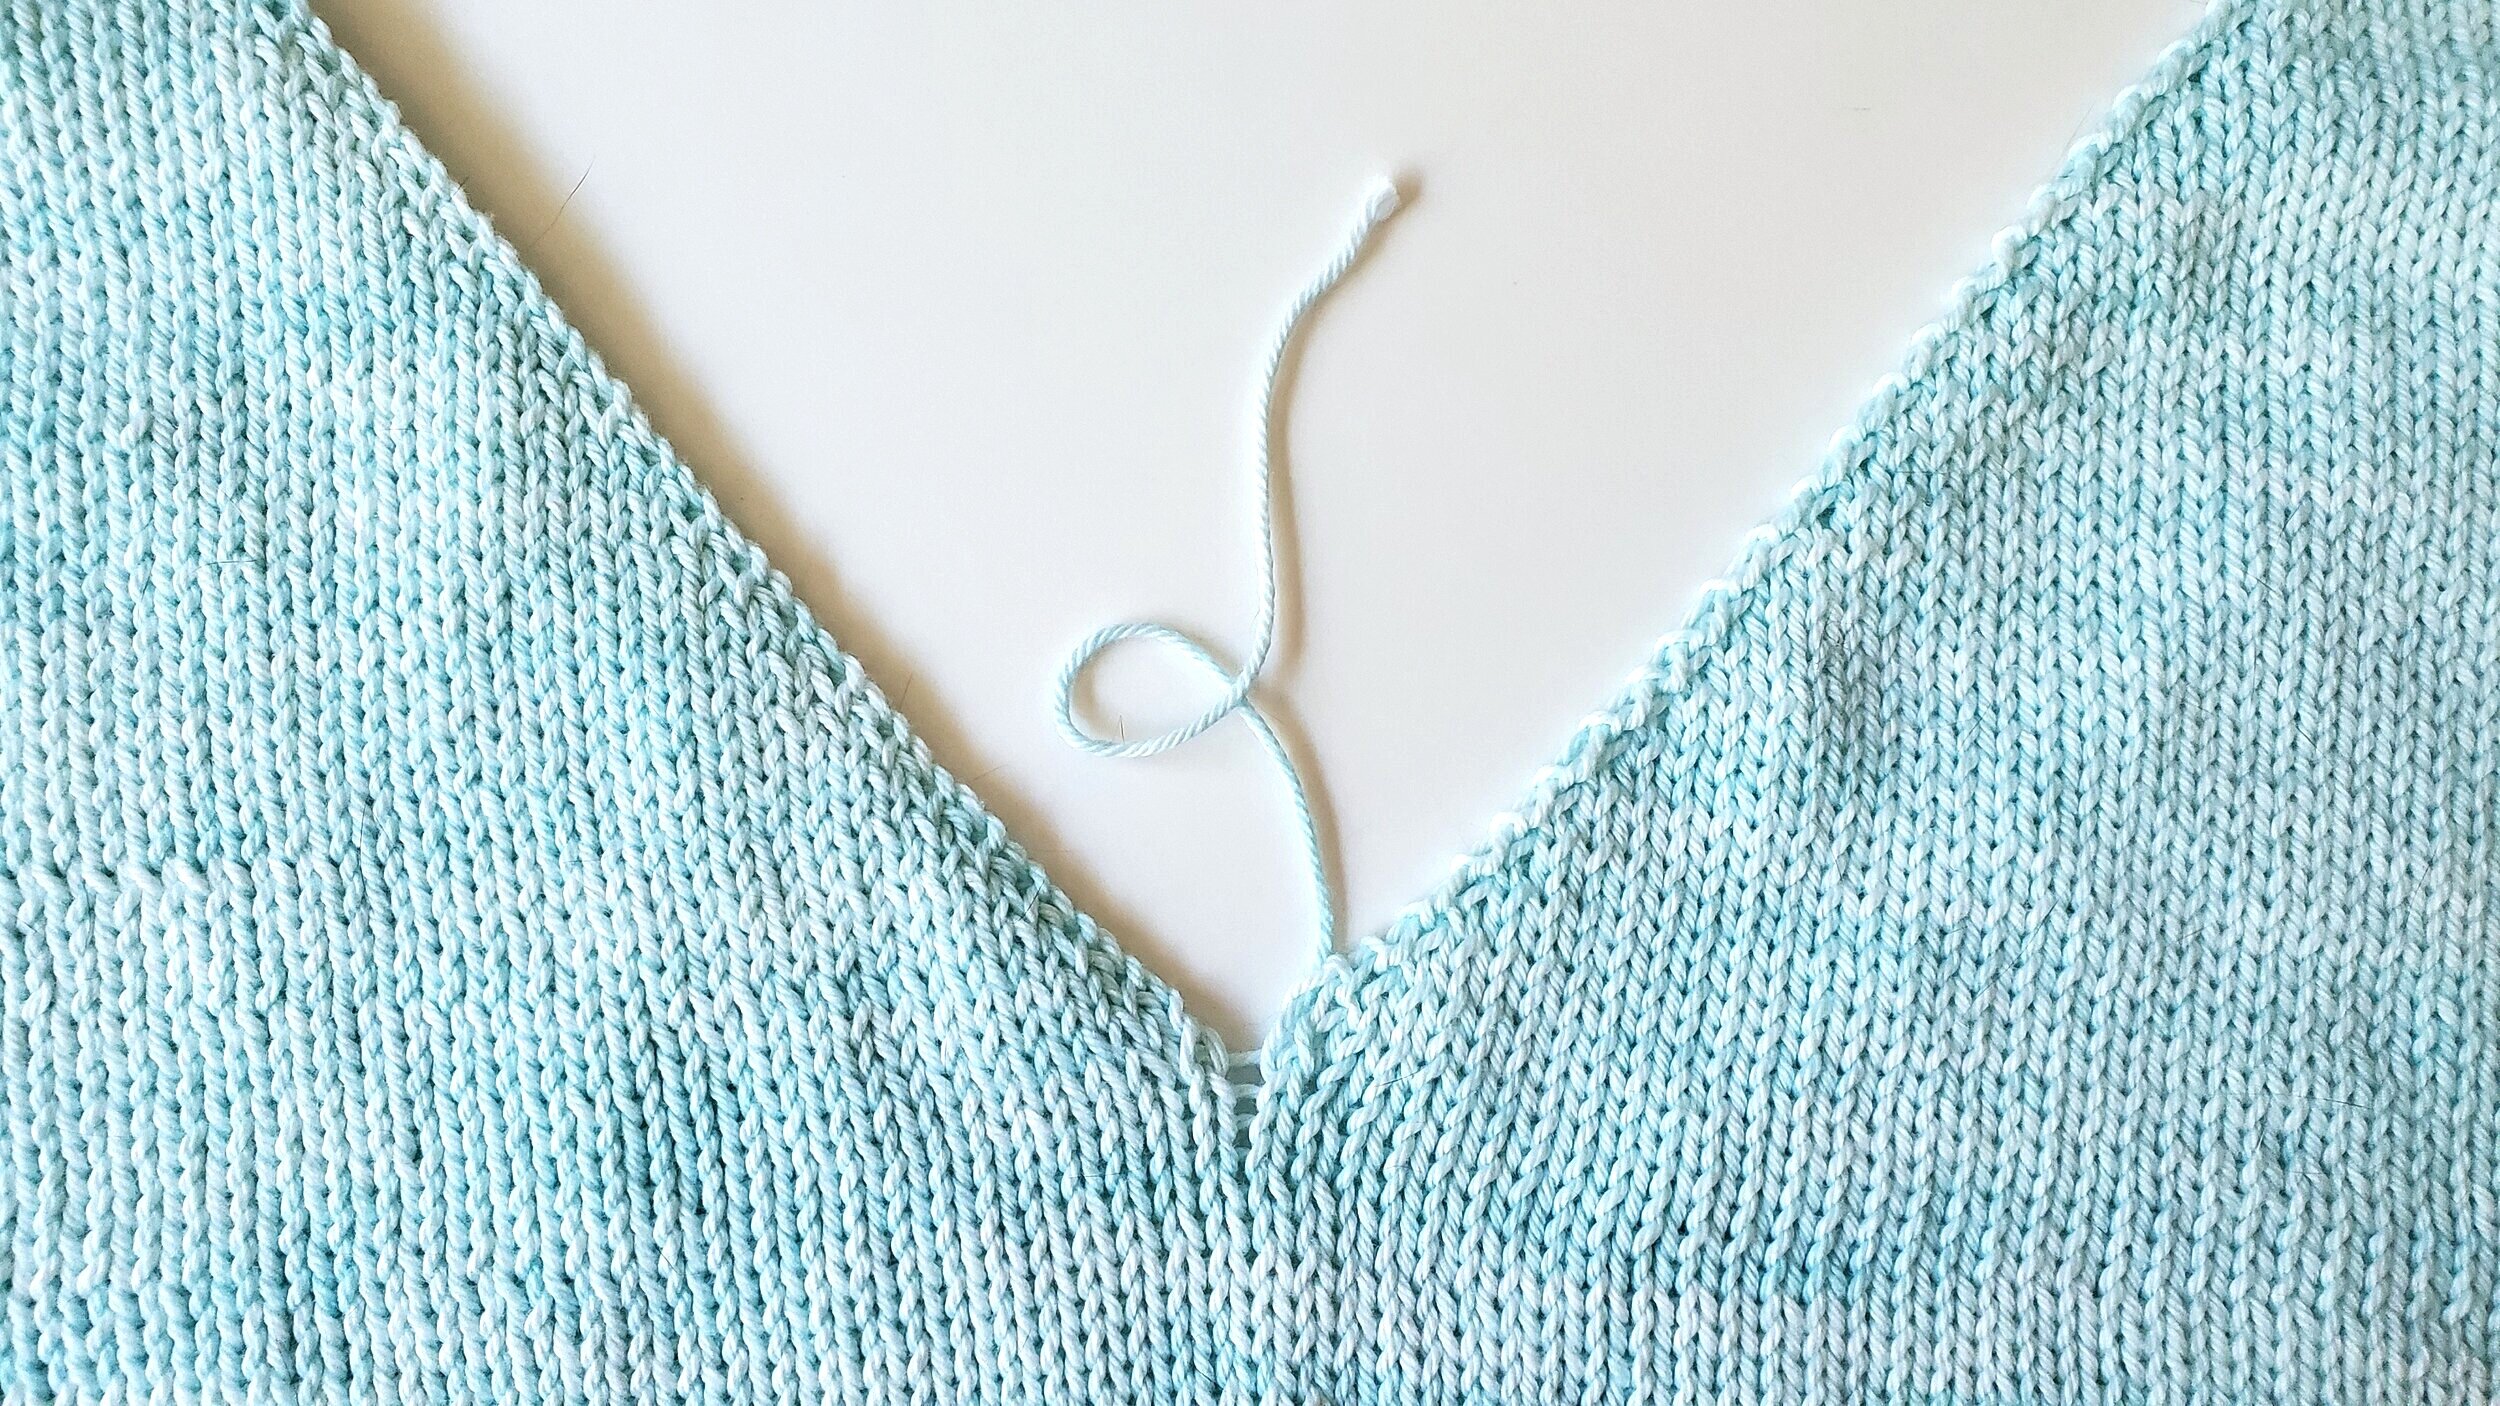
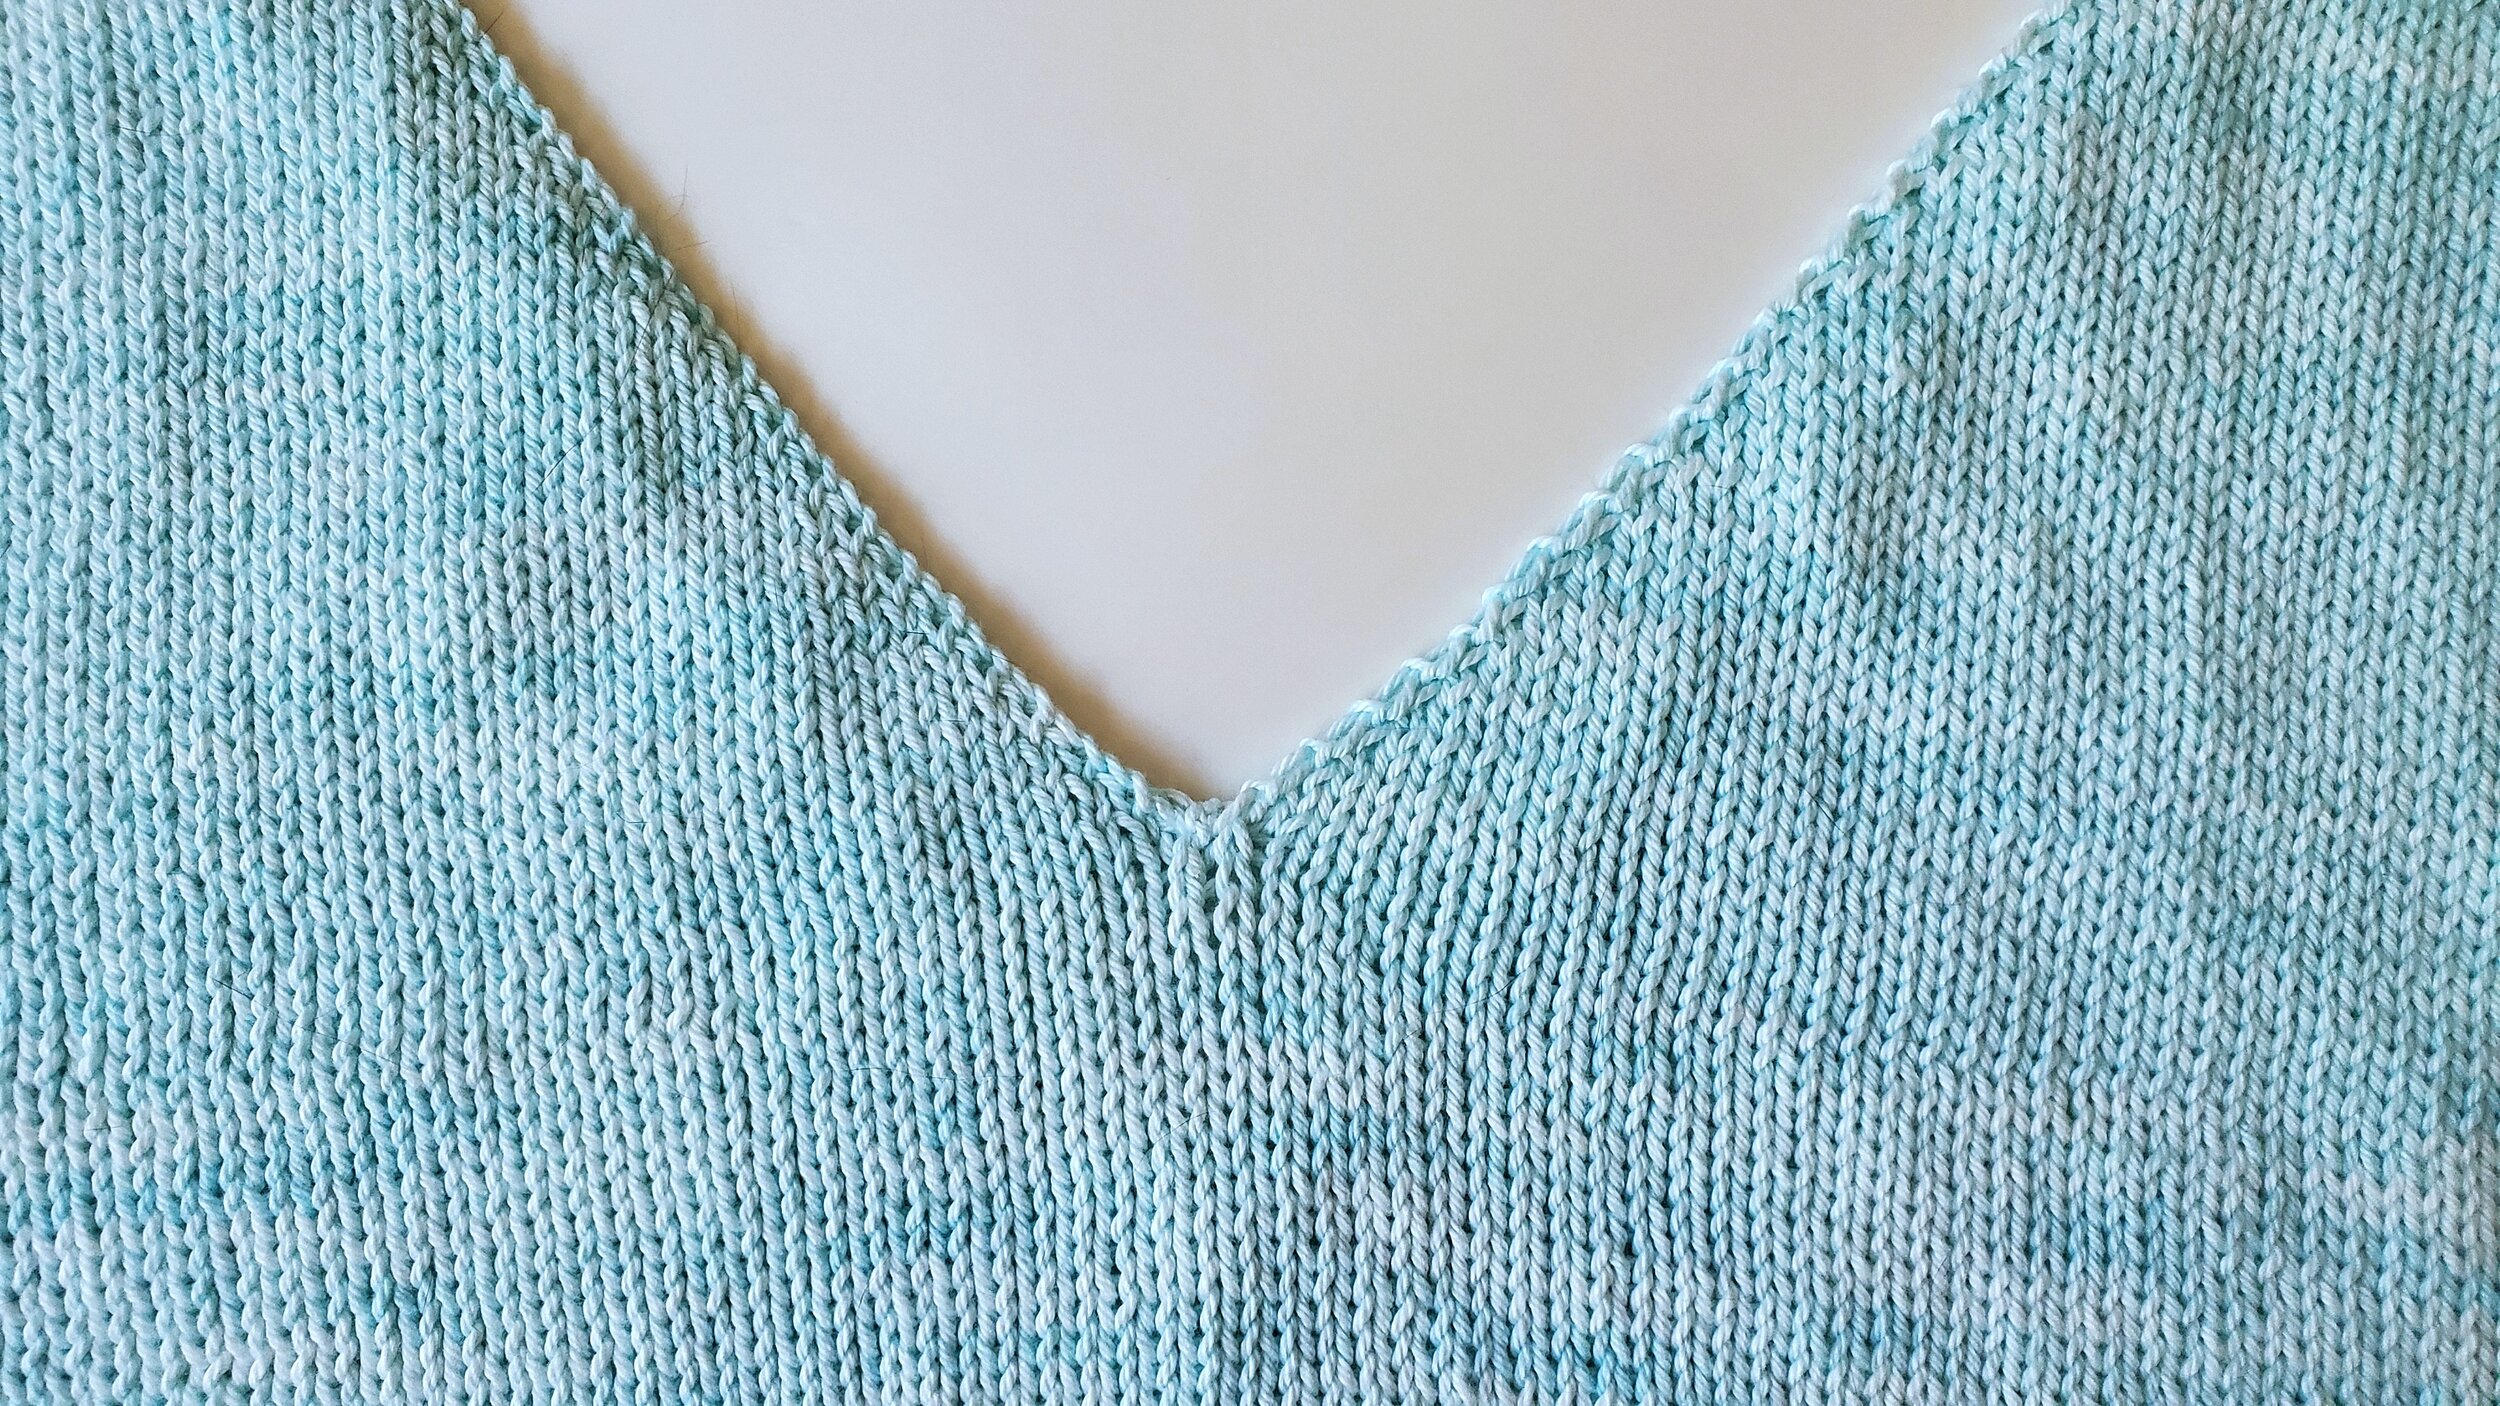
At the join between each panel, you should have a tail of yarn (except between panel 4 and 1). I like to use this tail to reinforce the top of the join - just use the tail to sew together those top two stitches, and then secure your end as normal. This creates a tighter, cleaner join between panels that will hold up better to wear. At the join between panels 4 and 1, I use an extra scrap of yarn to reinforce the join. Check out the before (left) and after (right) pictures below to see what a difference this makes.
Finishing the straps.
Now that the body of your piece is done, it’s time to finish up those straps! I already mentioned that we have two strap options, but while finishing this piece I’ve come up with a third option for you too! Read about each option below:
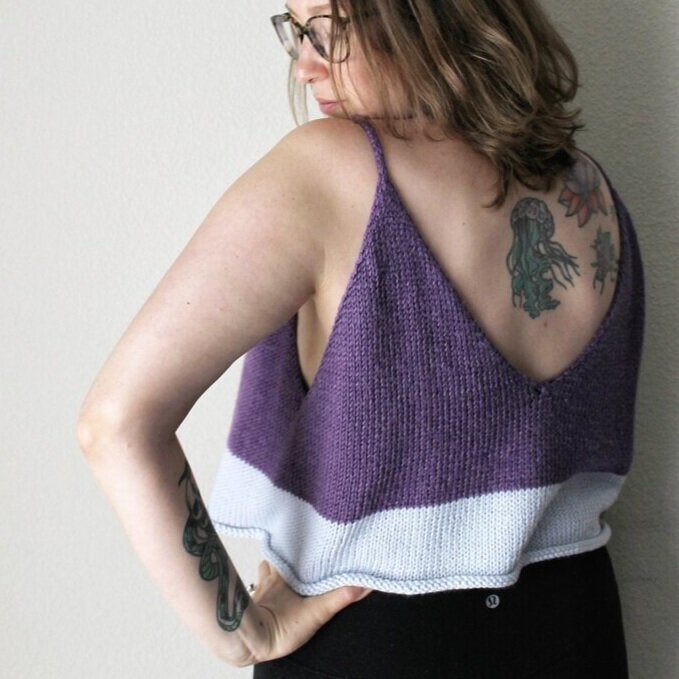
Simple straps (purple) - right front strap will connect to right back strap, and left front to left back. These are the shortest straps and have a simple tanktop look.
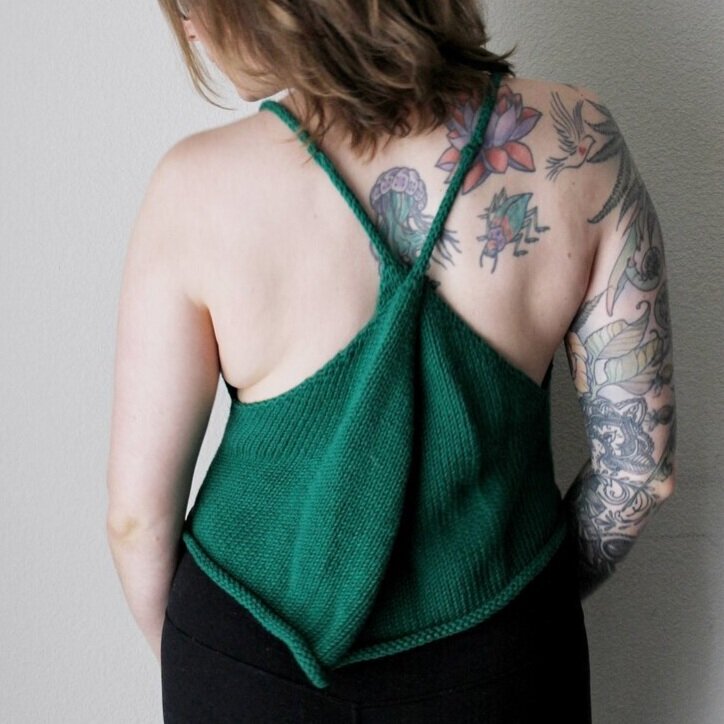
X-back straps (dark green) - right front strap connects to left back, and left front to right back. These straps have to be longer, but they create straps that may sit more securely on your body.
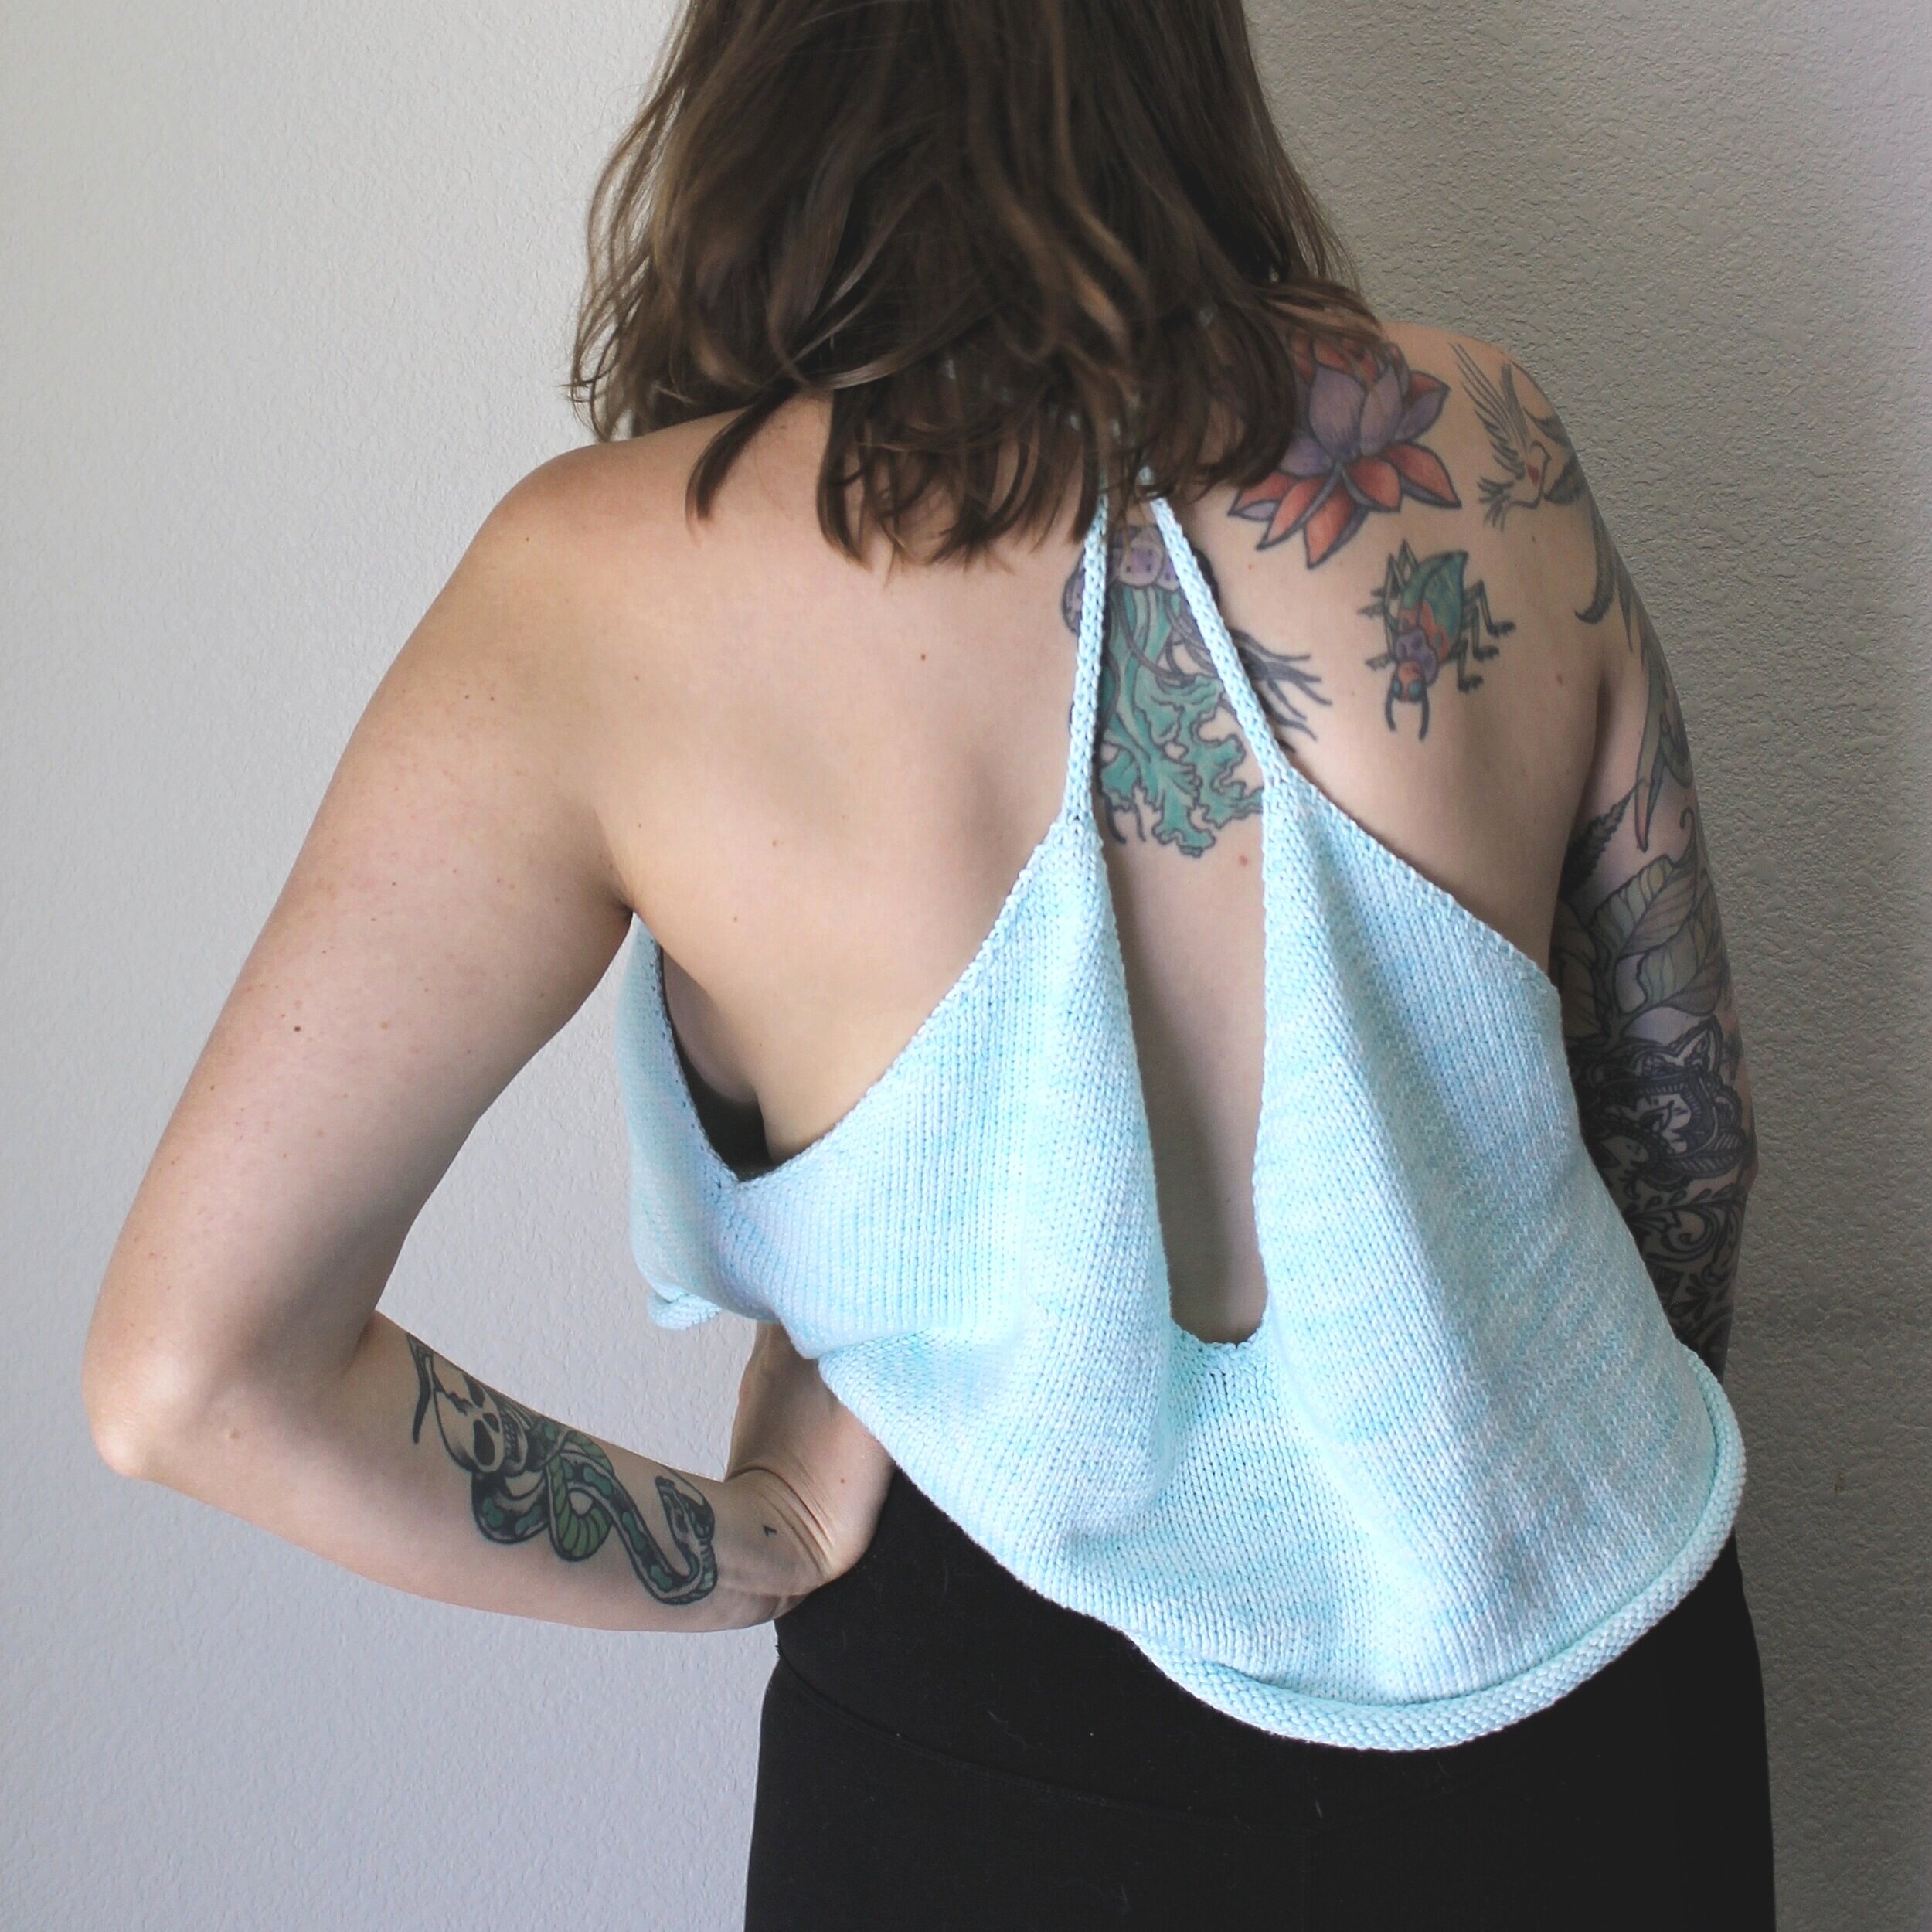
Modified halter (light blue, new!) - front straps connect to one another and are longer, back straps are shorter and connect to one another after passing through the loop made by the front straps. This is my new favorite! It sits on your shoulders securely like the x-back, but this allows you to hike up the back of your tank a bit to make the top sit a little nicer on your body.
I recommend trying each by pinning your straps together with a safety pin in each configuration, using a scrap piece of yarn to temporarily connect straps in the configuration if they aren’t long enough to pin. This will also allow you to get an idea how long you want each strap to be.
How to finish your straps:
Remove the provisional cast on (carefully!), and place strap sts back on your needles.
K on the RS and P on the WS until your straps are the desired length. (Again, I recommend trying it on as you go to get the right length.)
When seaming your straps, make sure they are not twisted. If you wish to seam your straps with kitchener stitch, make sure you leave your stitches live. If you want to just simply seam the ends together, you can seam either from live stitches or after binding off.
Note: I recommend you make each set of connected straps balanced - if you need 12-inches of strap to connect one side to the other, each strap should be 6 inches long. For the regular tanktop straps or the simple x-back, all 4 straps should be the same length. If you are going with the modified halter option for connecting straps, the back set will be shorter (left back and right back should be the same length) than the front set (front left and front right should be the same length).

Here is what my piece looked like as I connected my straps with the new modified halter option. Notice that one set of straps (on the right in the photo) is longer than the other set (left in the photo) - the longer set goes in the front, and the shorter goes in the back.

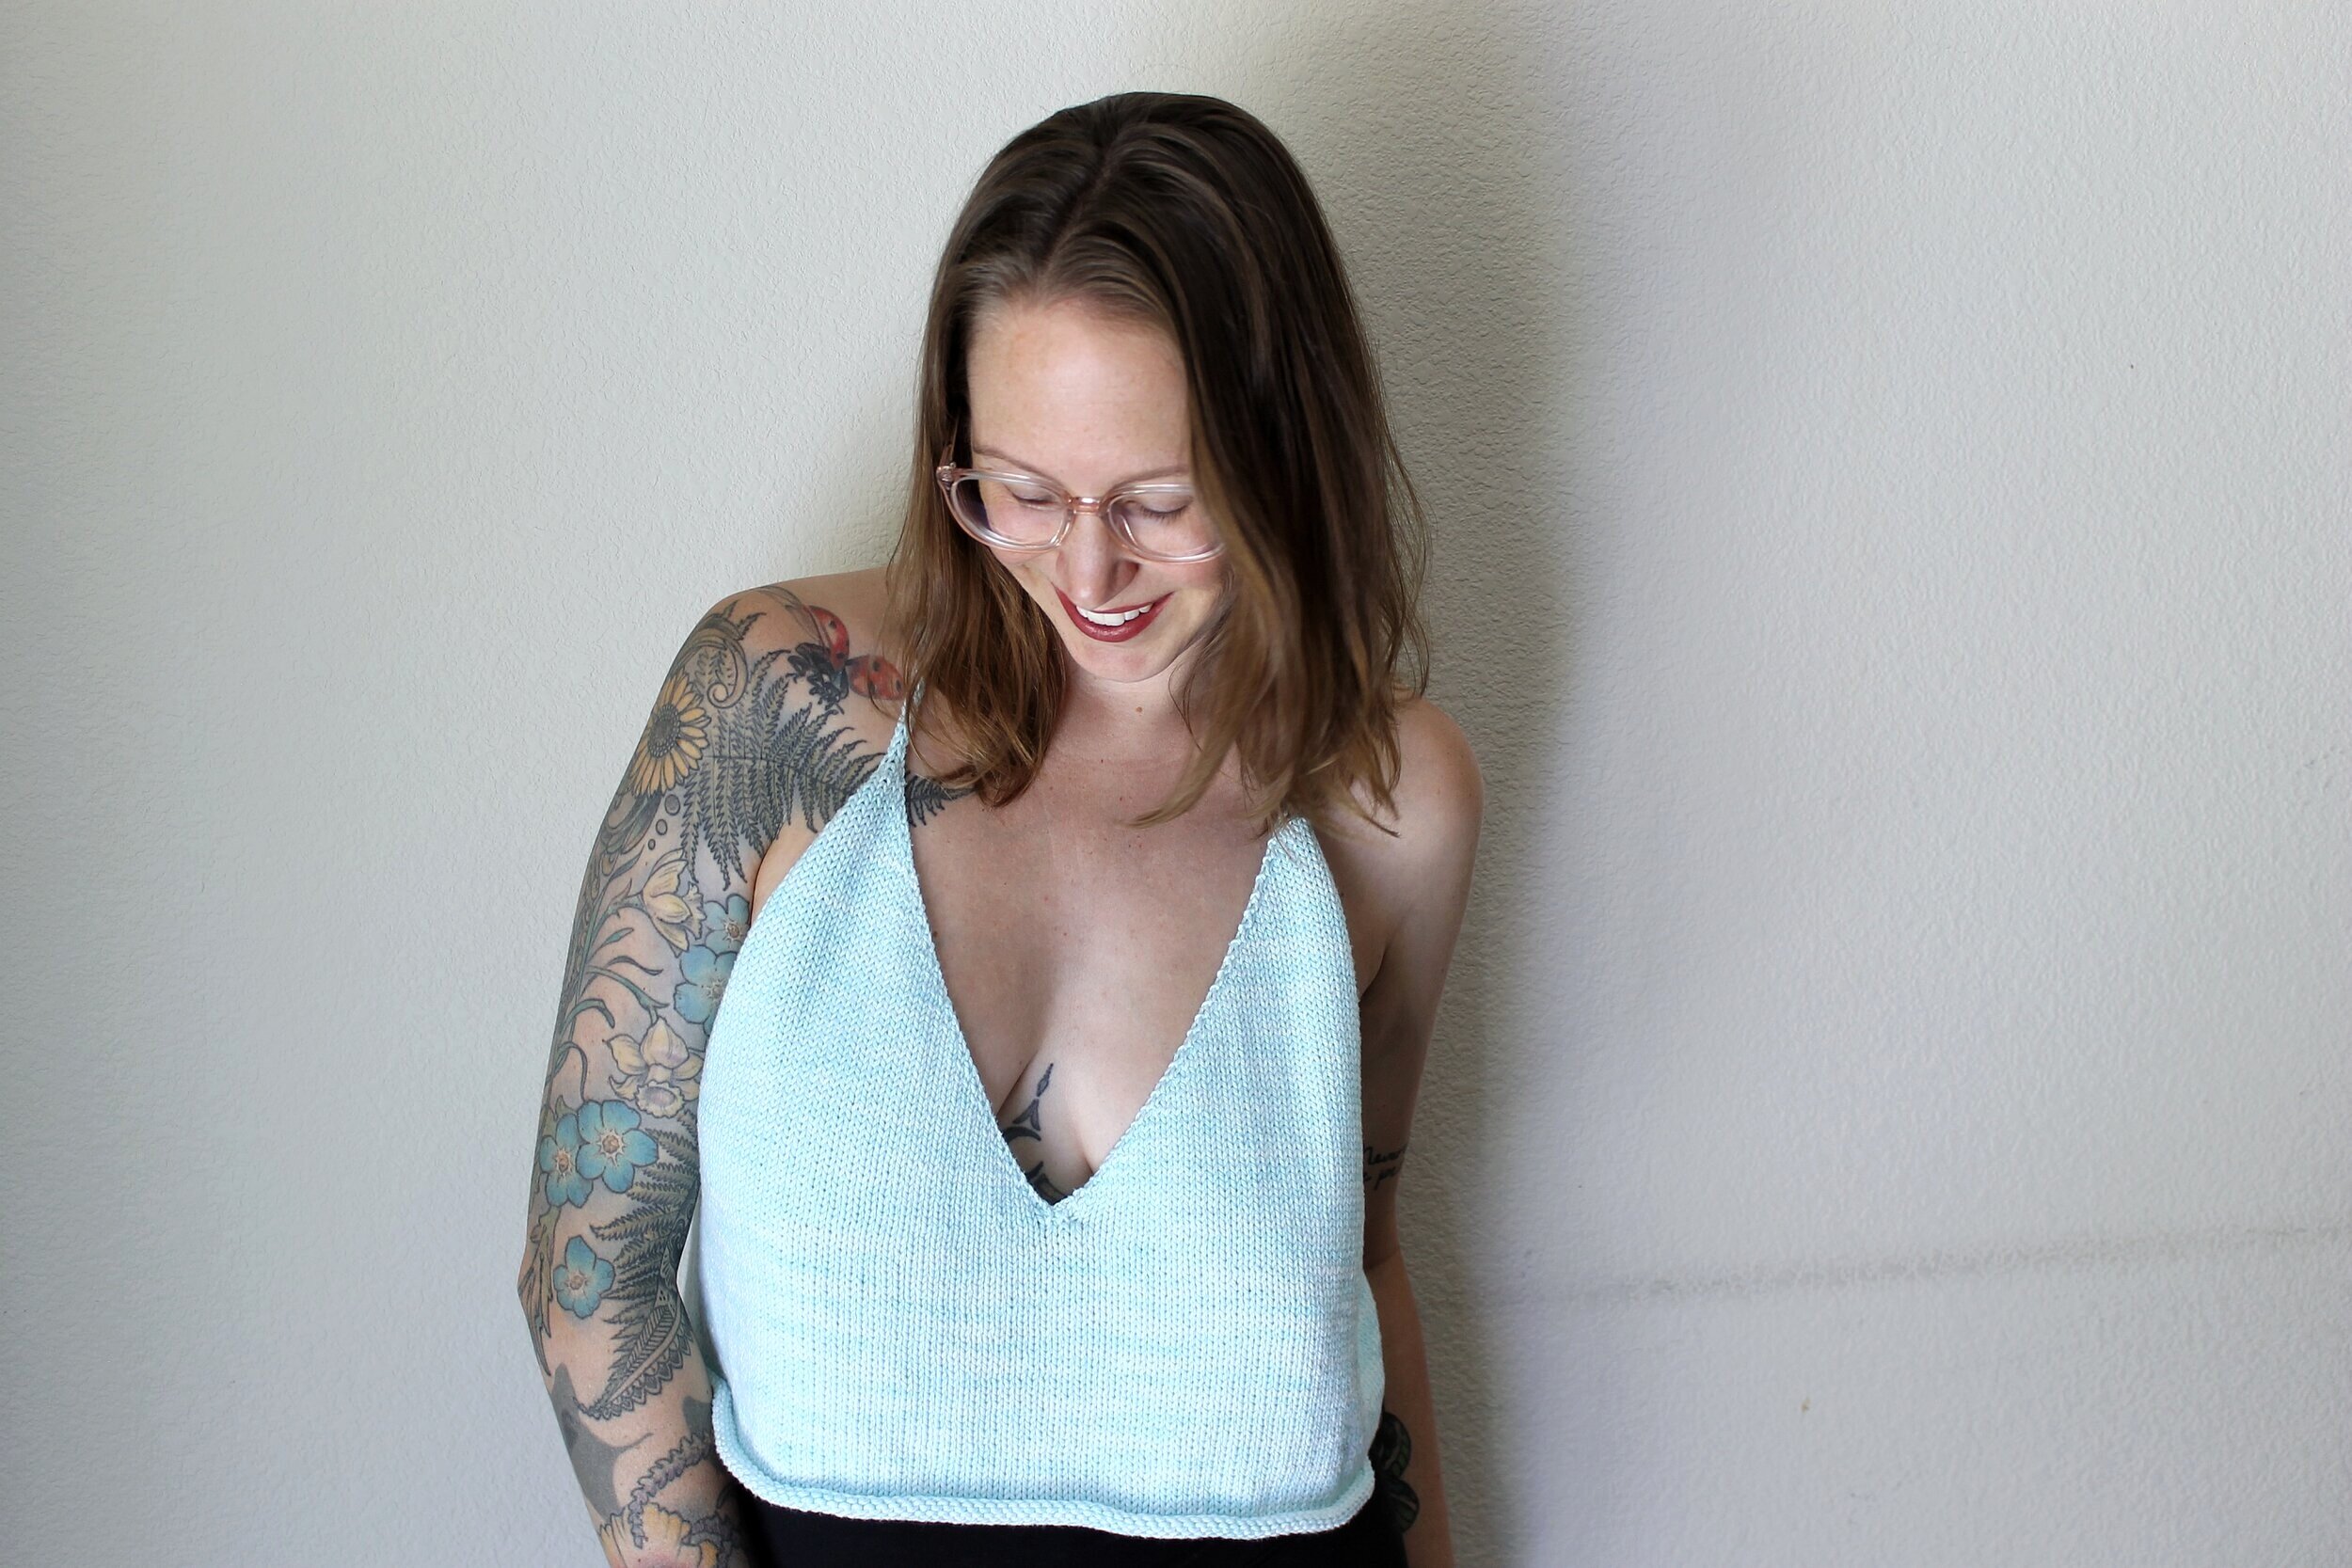
The finished product.
Once you’ve woven in all your ends, you’re done! Care for your yarn as indicated. With my Malabrigo Verano cotton yarn, I tossed my piece in the washer and dryer (on delicate, but yes I am very lazy with my knits). If you are working with a wool yarn, you may desire to block your piece.

Thank you so much for joining me!
I cannot wait to see your finished pieces! Please share lots of pictures, and tag them with #PholcusTank. I would love if you can tag me, too!
There is now a PDF version of this pattern available on Ravelry if you would like to purchase.