Pholcus Tank Knit-A-Long Part 2: Straps, Provisional Cast On, and Working Increases
Ok everyone, here we are! Part 2 will walk you through approximately the first half of your knitting for this top. Next Sunday, I’ll be posting Part 3 where we finish the piece. Let’s start knitting!
Reminders for those of you who want to use my suggested stitch counts:
Gauge: 20 stitches and 31 rows to 4” (10 cm)
Size notation: XS (S, M, L, XL) (2X, 3X, 4X, 5X)
Actual bust measurements:
28” (32”, 36”, 40”, 44”) (48”, 52”, 56”, 60”)
71 cm (81, 91, 101, 111) (122, 132, 142, 152)
Ease: 4” (10 cm) will be ADDED to each of the sizes above for a finished piece with a bust measurement 4” (10 cm) larger than the actual bust measurement indicated.
The bulk of this post will cover the details of the decisions you need to make, and you will find the first part of the pattern clearly written out for you down near the bottom.
Straps - a decision to be made (but one you can change later!).
When you are starting this piece, it’s a good idea to consider strap configuration. However, since we will be using a provisional cast on, you won’t have to choose your strap configuration until the end.
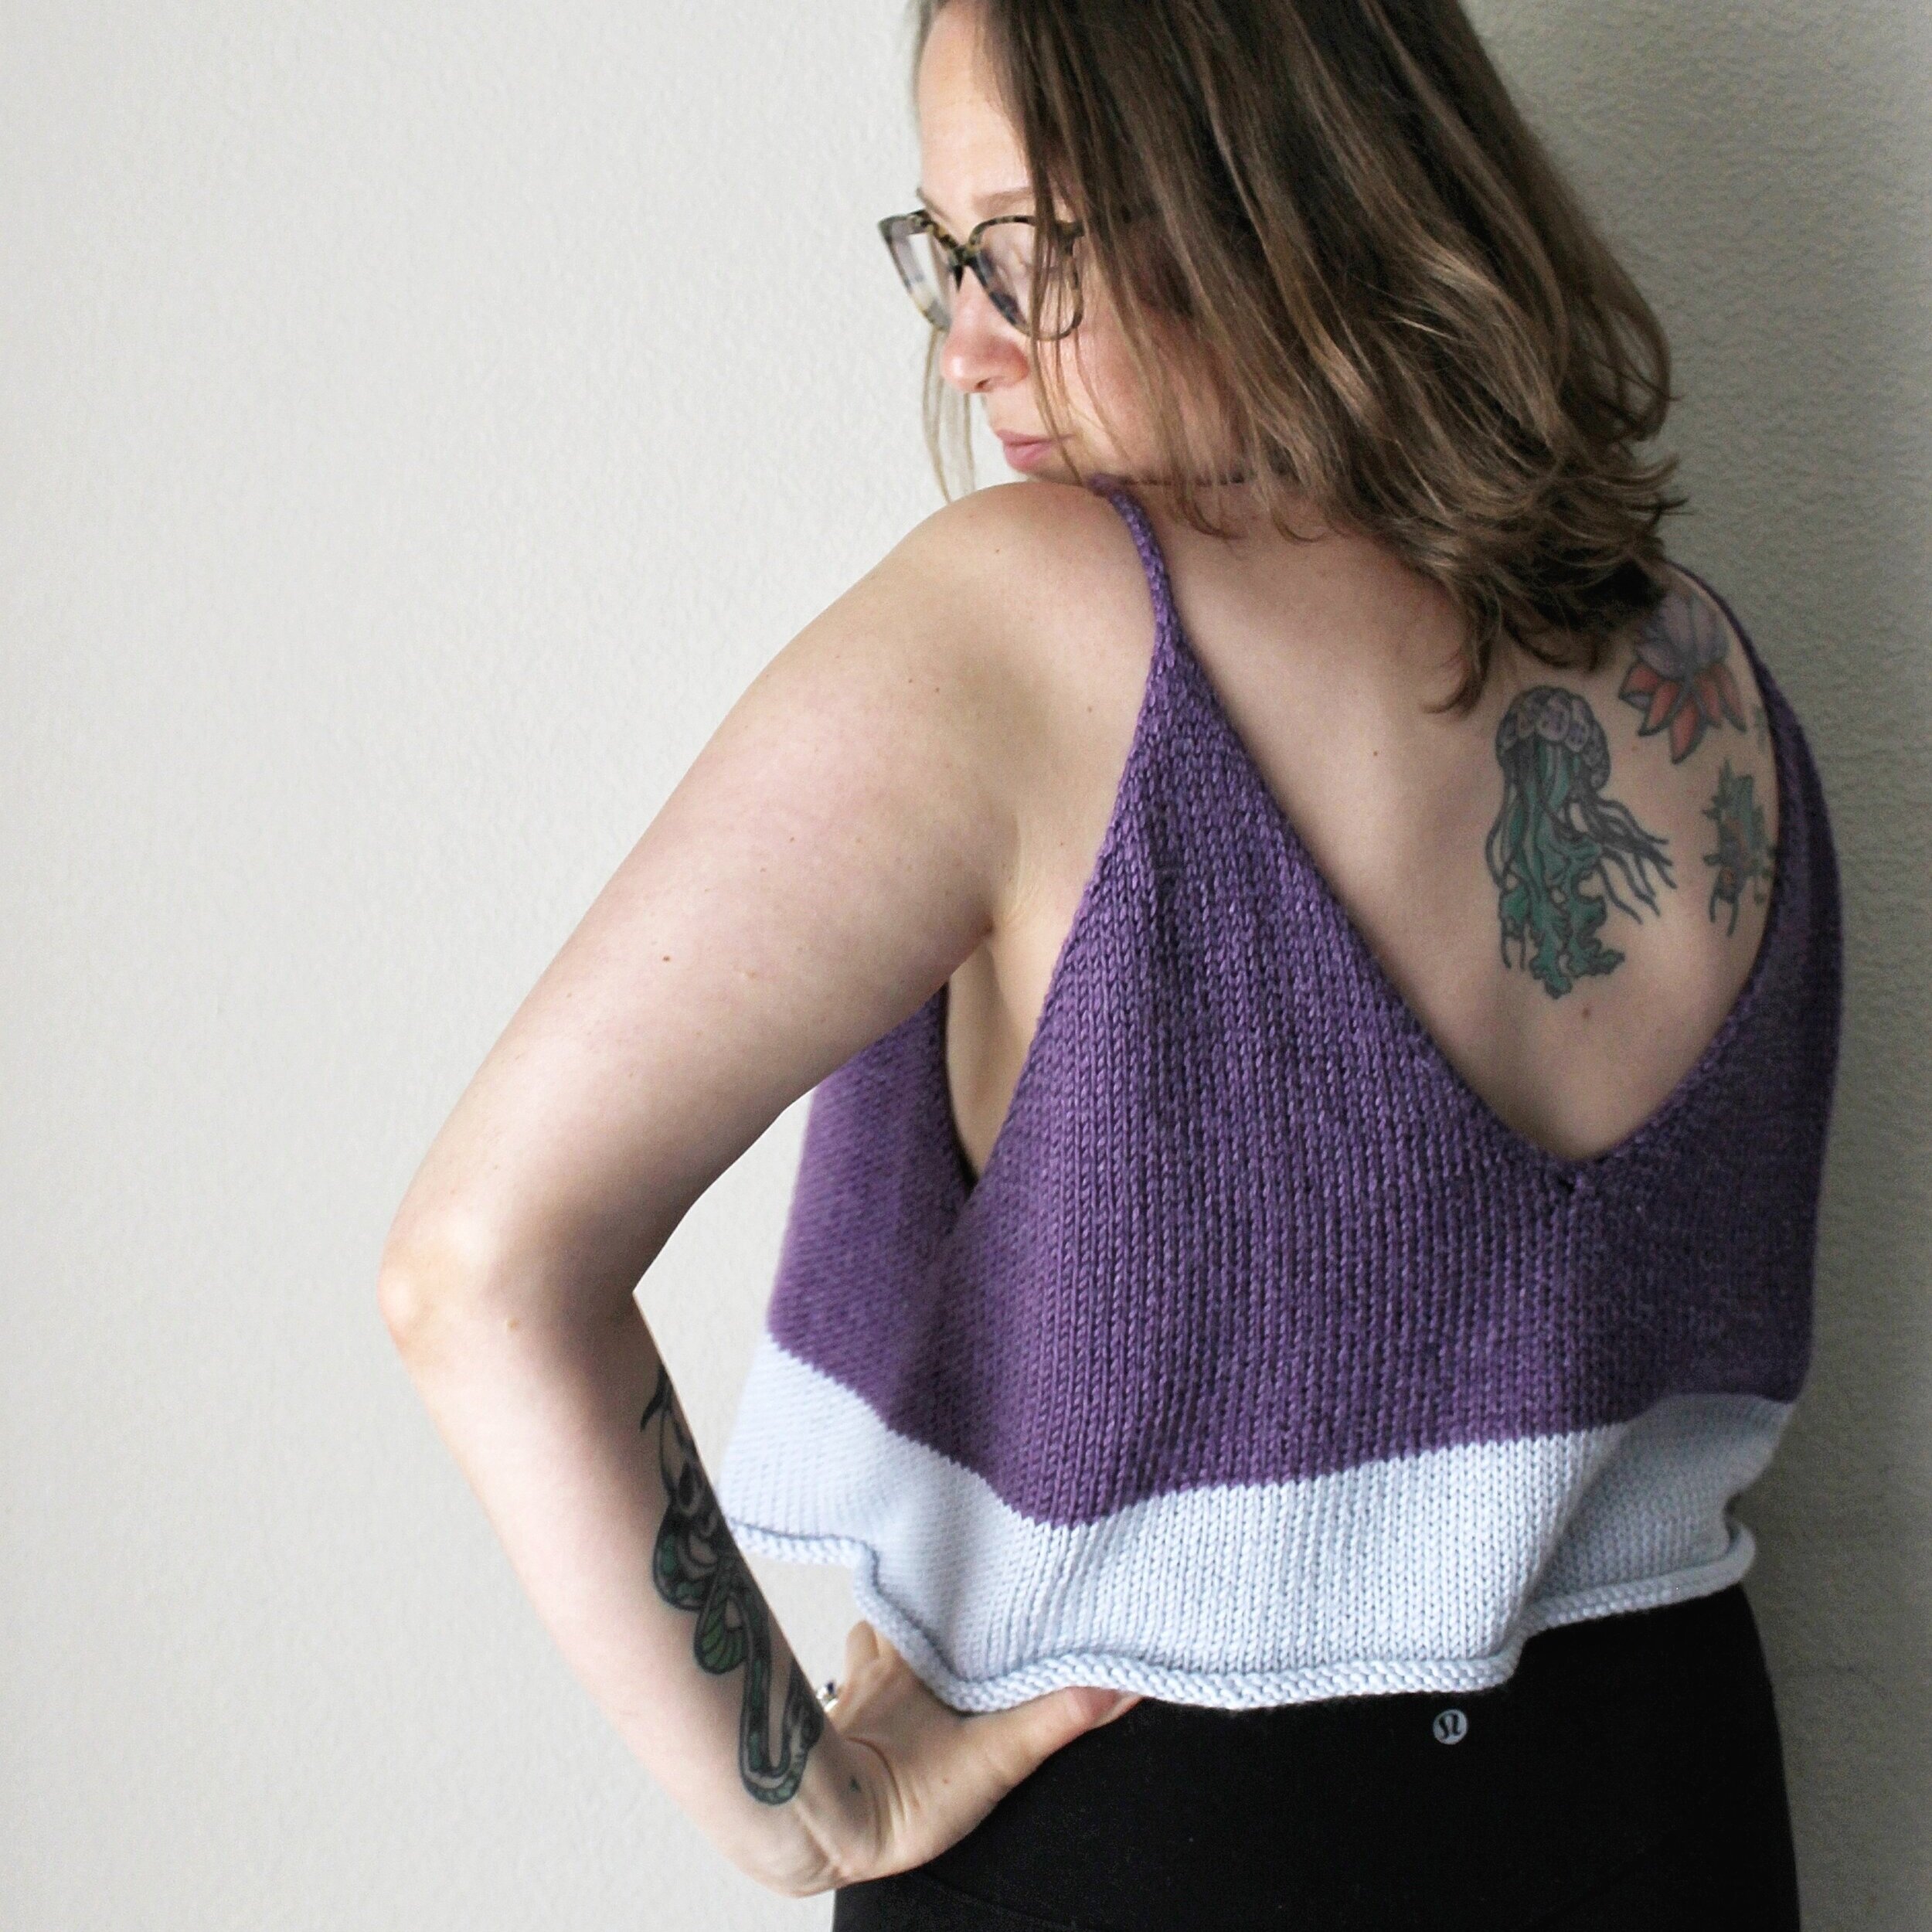
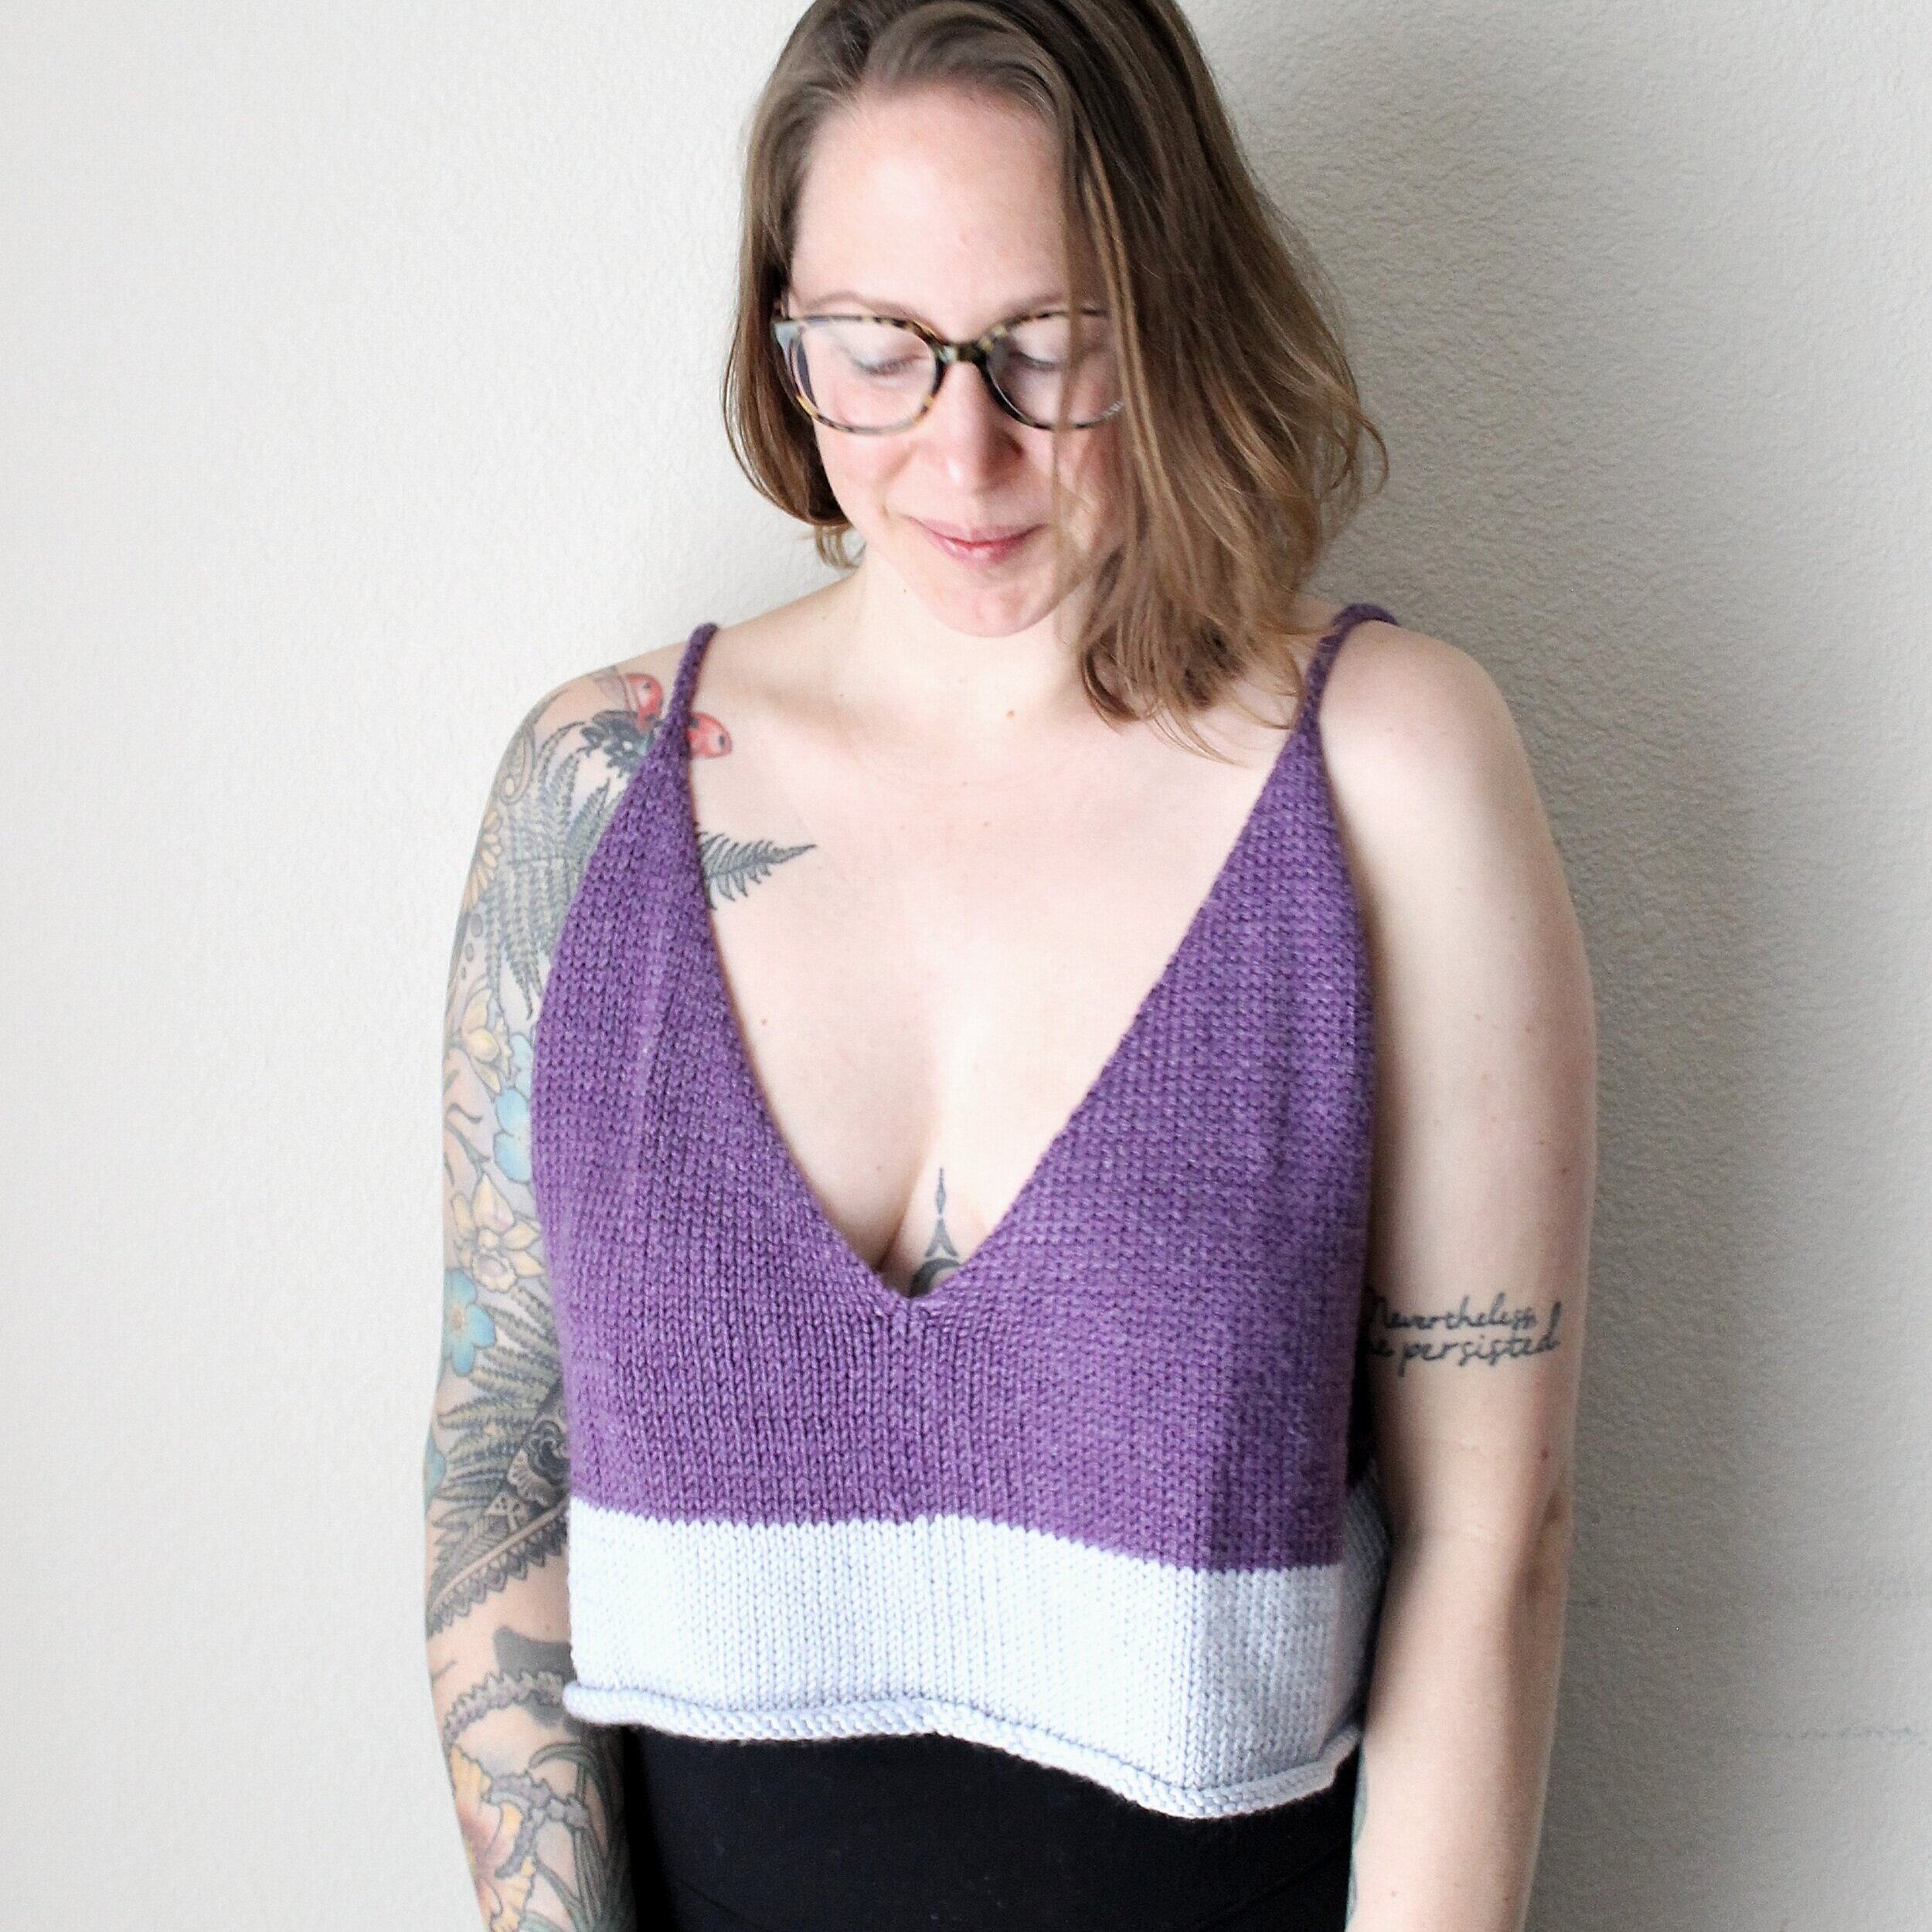
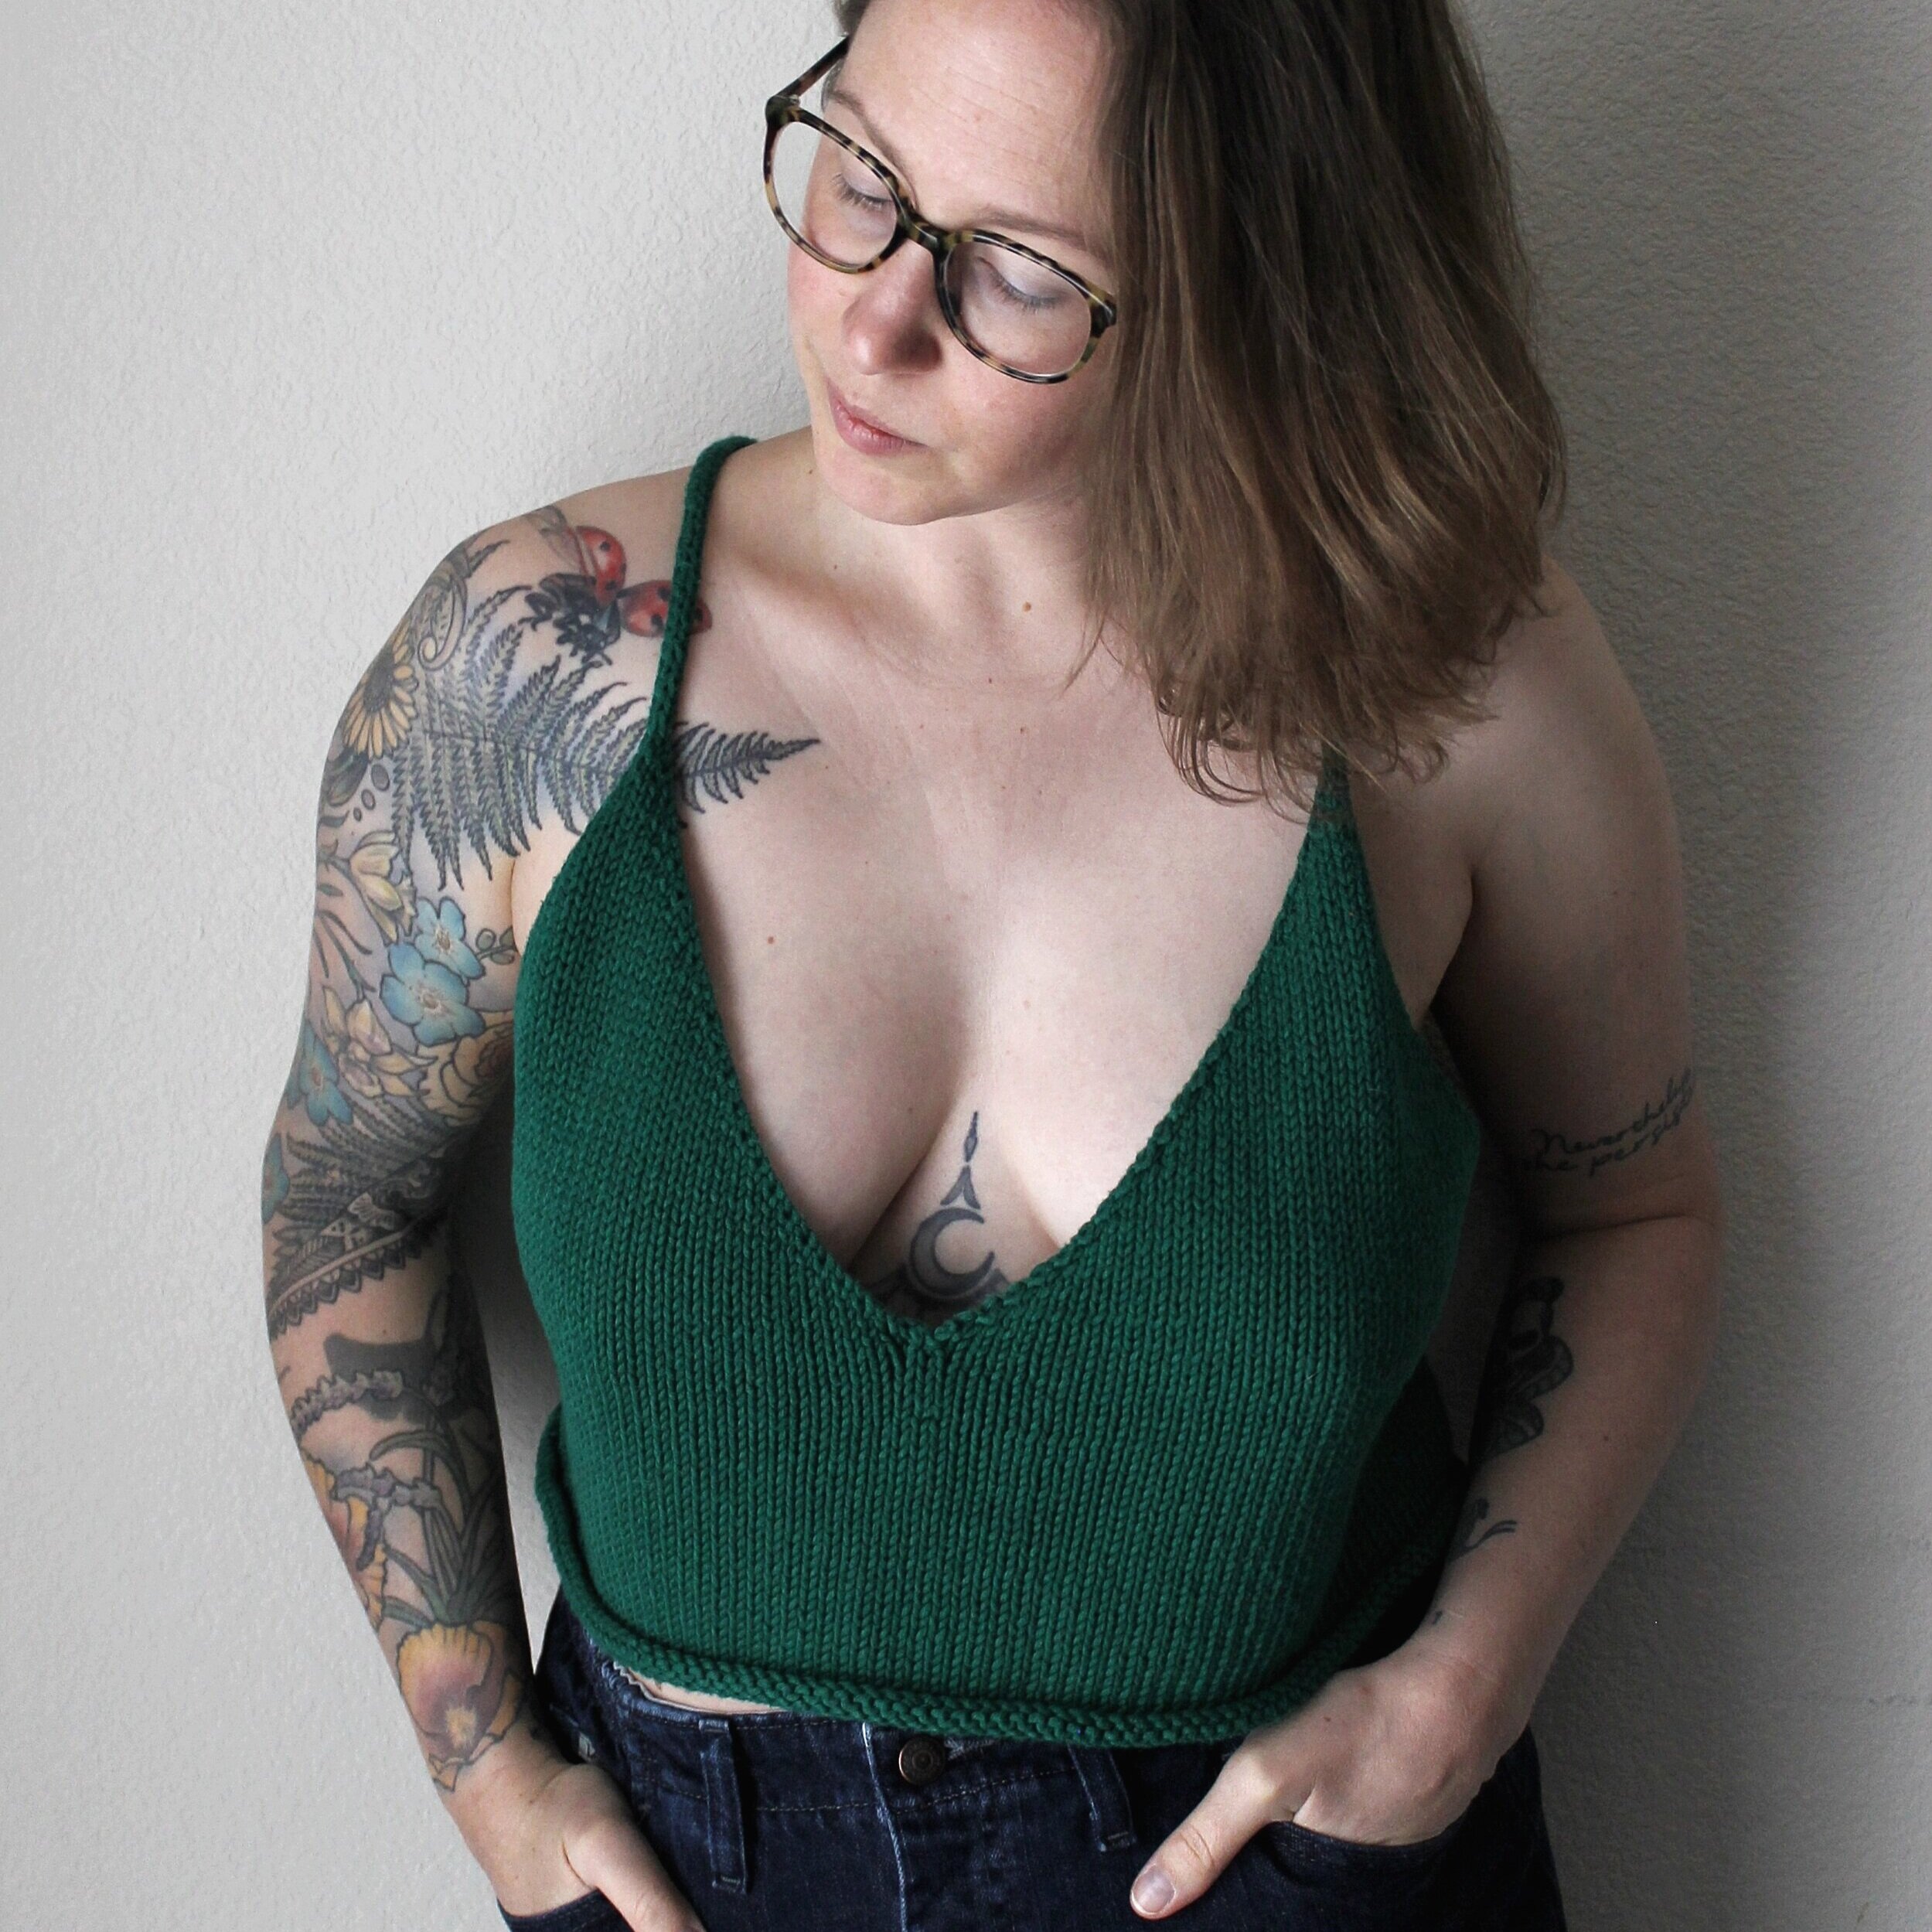
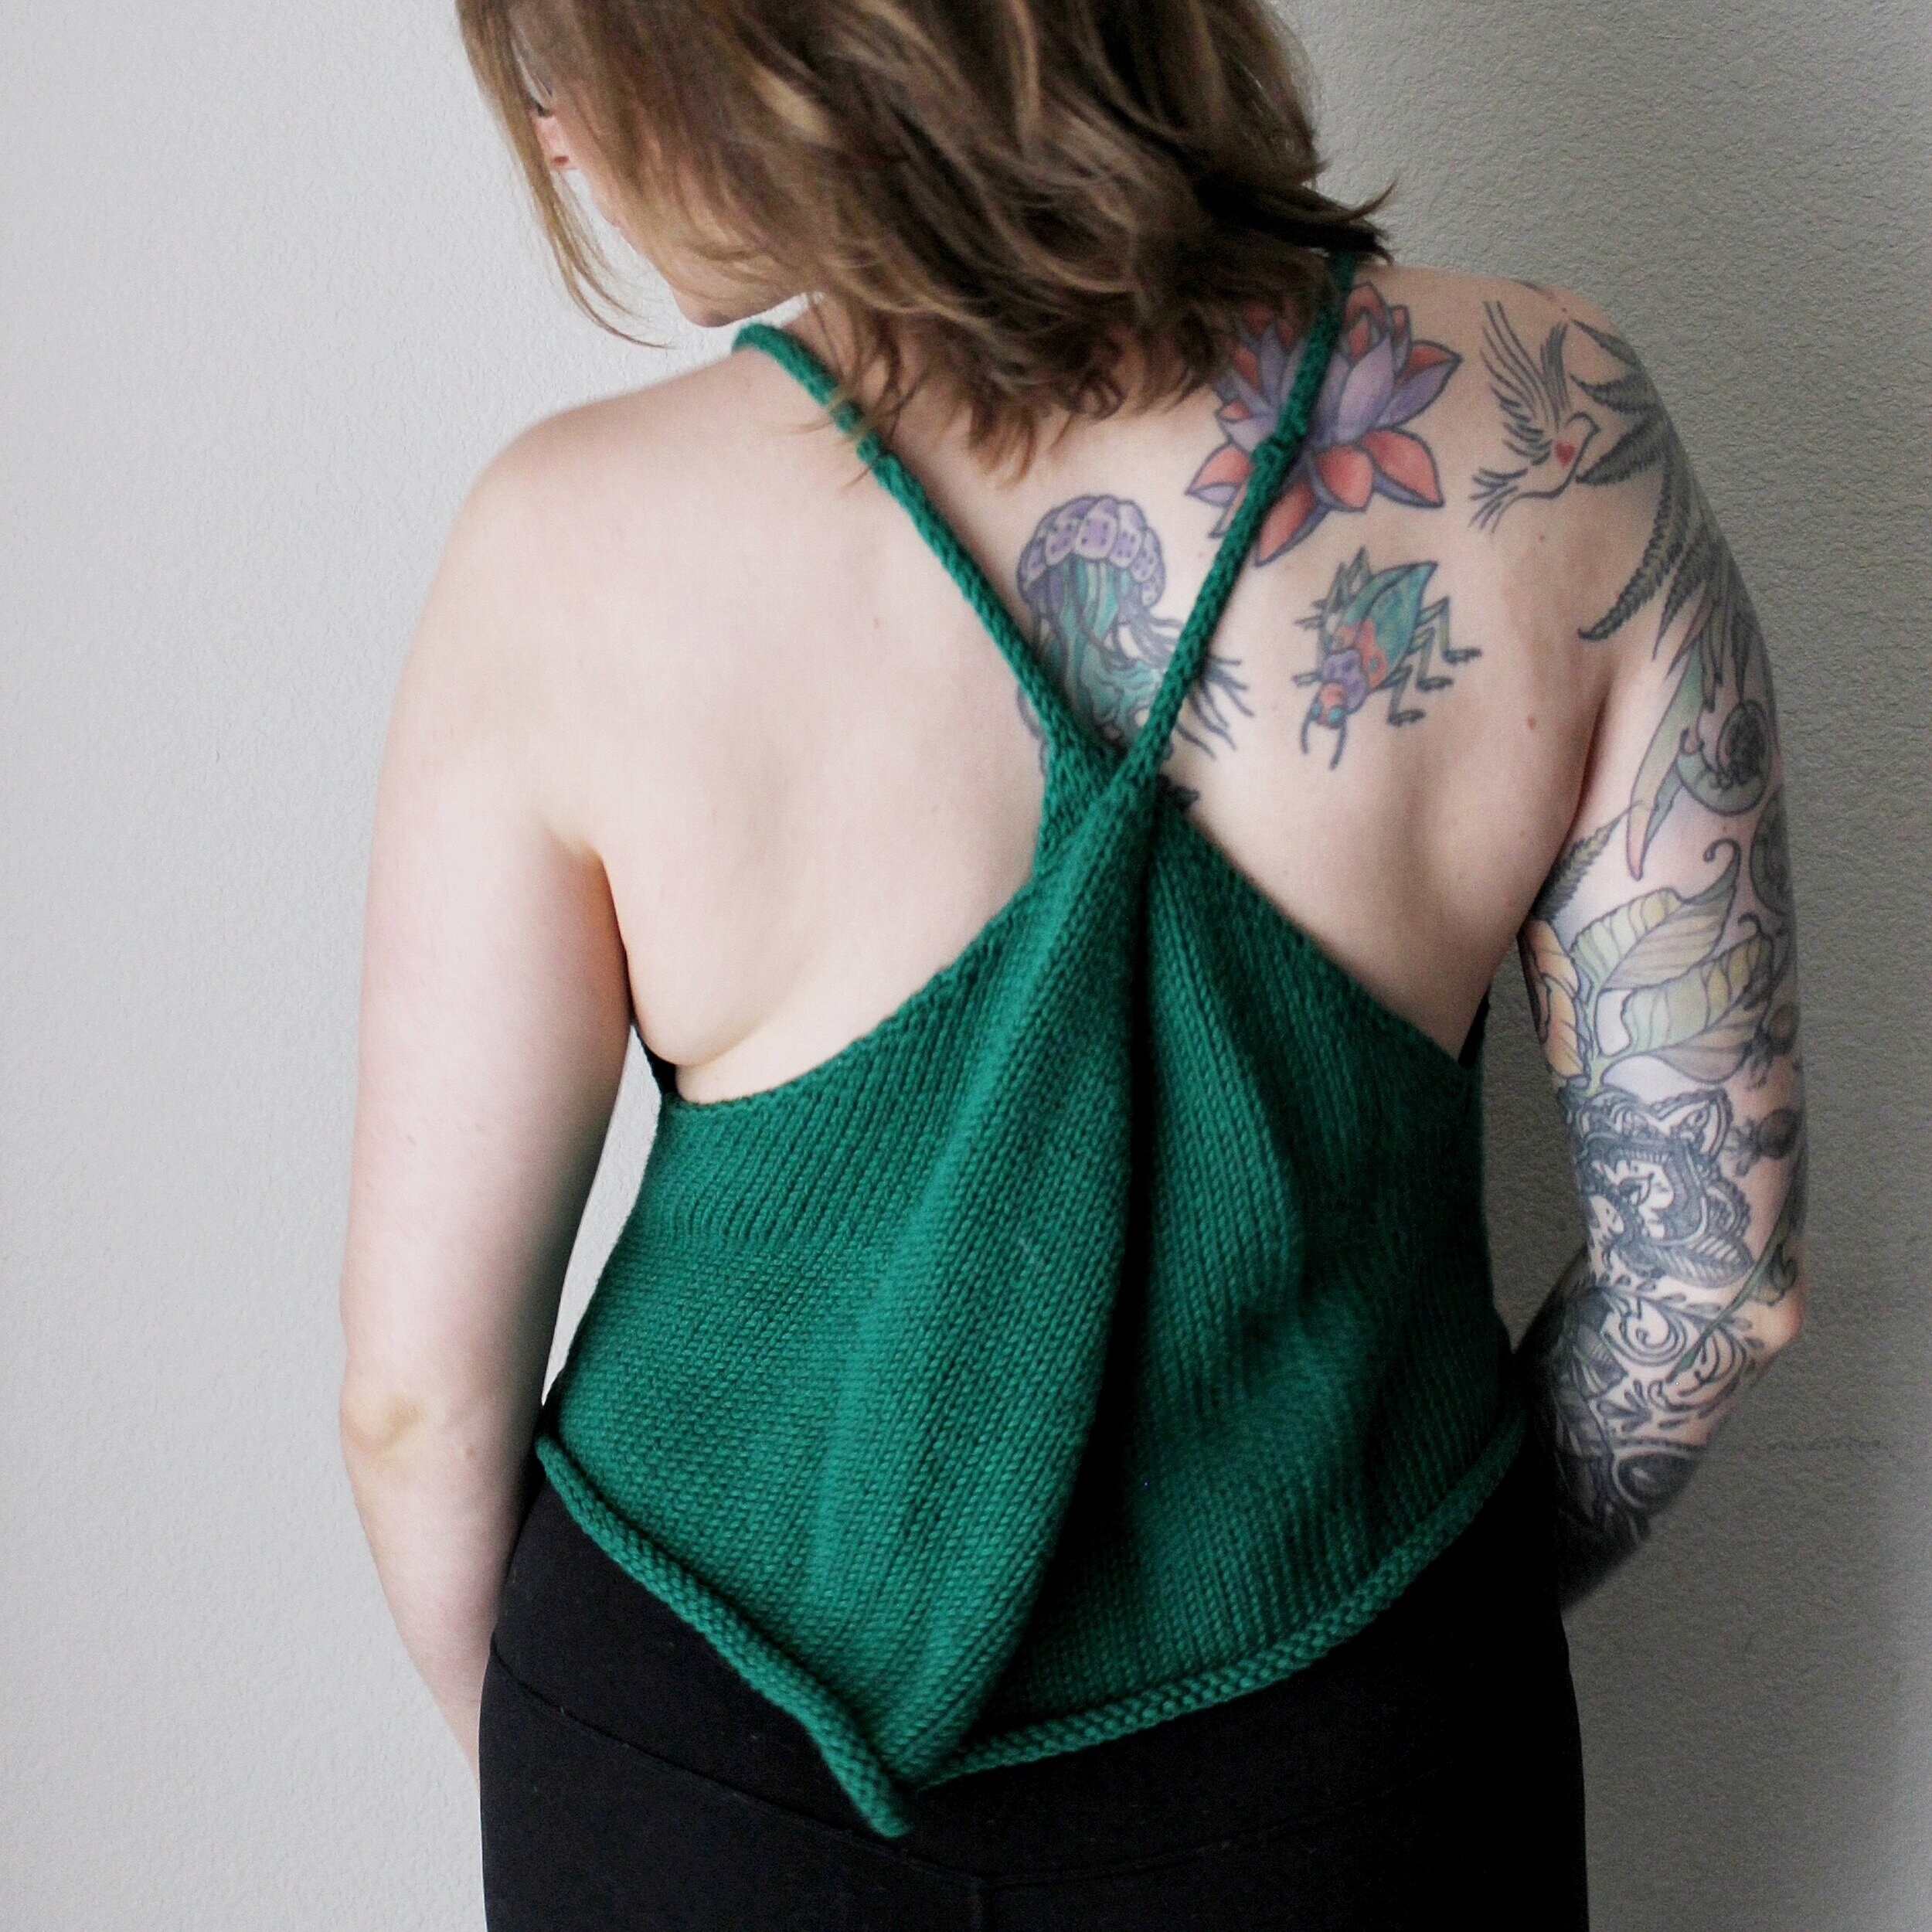
The Pholcus Tank was designed so you could wear simple straps, or use a cross-back design. Below, you can see examples of both options. The purple top has simple, regular tanktop straps. The green top has a cross-back design.
The strap configuration you choose is totally up to you! For the blue top I’m working on, I’ll be doing another cross-back design. This is because my bust measurement is fairly large compared to my shoulders and waist, and the cross-back straps help keep the top a little more secure on my body.
Whichever strap design you think you will prefer, you can always change your mind later when doing your seaming. If you are unsure right now, stick with the simple strap design, which will be the shorter strap option. Since we use a temporary cast on, you can always add more rows to your straps when you are finishing the top.
Provisional cast on - why and how.
OK, you might hate me for this at first, but we are going to use a temporary cast on for this project. I know this may sound really intimidating, but this is by far the best way to start your straps without having to commit to their length just yet. There are two reasons why we are using this cast on instead of me just telling you how long to knit your straps:
I want you to be able to customize the depth of the V in the front of your top. Everyone has a different amount of skin they are comfortable showing, and I don’t want to dictate how much skin you should be exposing. This way, you can bring your top up to cover a little more, or lengthen your straps to cover a little less, depending on your preference.
Because everyone might be using completely different yarns with different amounts of stretch, my estimates for how long or short to make your straps may not work well with every type of yarn.
(Bonus reason!) I’m all about customizing knits to fit your body and your style, so I want to help you learn one way you can do just that!
When doing a provisional cast on, you have a few options.
First, if you have a crochet hook on hand, you can crochet around your needle to “cast on” with scrap yarn. Then, when actually knitting, you will work into the loops that were crocheted onto your needle. Purl Soho has a great video demonstrating this technique. In the end, you have a cast on that you can unravel quite easily when you need to pick up your live stitches later.
But what if you don’t have a crochet hook on hand, or just aren’t comfortable with that method? You can also use a modified long-tail cast on with a scrap piece of yarn to provisionally cast on. We Are Knitters has a video that demonstrates this technique really well. With this technique, you end up with essentially a single lifeline-type strand holding your cast on stitches, which you can pull out at the end when picking back up your live stitches.
If you’re feeling particularly uninterested in these methods, there is a third option. This is my favorite, super lazy hack, but it only works well if you aren’t casting on very many stitches. All you have to do is complete your normal cast on with a scrap of yarn, making sure you break your yarn if you are using the same yarn as the rest of your project, and then start knitting as usual with a fresh strand. At the end, you will simply snip off your cast on (instead of unraveling it or pulling it out like in the options above) as you pick up your live stitches carefully.

Working increases - M1L and M1R
If you have never worked a “make 1 left” (M1L) or a “make 1 right” (M1R), keep reading! A M1L increases your stitch count by 1, and creates a stitch that leans to the left. A M1R does exactly the same, but the stitch you created leans to the right. We will be using both of these stitches in the pattern.
To work a M1L, you will use your left hand needle to pick up the bar between the stitch you just made and the next stitch on your left needle from front to back. You will the knit into the back of the “stitch” you just picked up.
To work a M1R, you will use your left hand needle to pick up the bar between the stitch you just made and the next stitch on your left needle from back to front. You will the knit into the front of the “stitch” you just picked up.
The video below shows how to knit rows 1 and 2 of the increases section in this project. In the first row, I knit the first stitch, then M1L, then knit until 1 stitch remains, then M1R, then knit the final stitch. In the second row, I simply purl across all stitches.
The pattern - beginning straps and knitting the increases.
Pattern notes.
Required techniques and abbreviations:
Provisional cast on - see above section for methods
Knit (K)
Purl (P)
Make 1 right (M1R) and make 1 left (M1L) - see above for tutorial
Right side (RS) - the side of your work that will face out
Wrong side (WS) - the side of your work that will face in
Stitch/stitches (st/sts)
Gauge: 20 stitches and 31 rows to 4” (10 cm), or use your custom gauge!
Size notation: XS (S, M, L, XL) (2X, 3X, 4X, 5X)
Actual bust measurements for size notation:
28” (32”, 36”, 40”, 44”) (48”, 52”, 56”, 60”)
71 cm (81, 91, 101, 111) (122, 132, 142, 152)
Ease: 4” (10 cm) will be ADDED to each of the sizes above for a finished piece with a bust measurement 4” (10 cm) larger than the actual bust measurement indicated.
Starting the straps.
Setup: Provisionally cast on 3 sts
Row 1: K 1 row (RS)
Row 2: P 1 row (WS)
Continue working rows 1 and 2, finishing with a purl row until your straps measure…
for simple straps: 1” (3 cm)
for cross-back straps: 4” (10 cm)
Note: we will be adding length to these straps at the end of the pattern so the top fits how you want, this is just a starting point for the straps.

Working the increases.
You will complete the directions below a total of 4 times to create 4 identical panels.
Setup: ensure you are starting with a RS row. You should have a stitch count of 3 sts.
Row 1: k1, M1L, k1, M1R, k1 (5 sts)
Row 2 and all WS rows: p all sts
Row 3: k1, M1L, k3, M1R, k1 (7 sts)
Row 5 and all RS rows: k1, M1L, k until 1 st remains, M1R, k1
Each RS row, you will increase by 2 sts.
Continue repeating Row 5 (RS) and Row 2 (WS) until your stitch count reaches 43 (47, 53, 57, 63) (67, 73, 77, 83). If you are using custom gauge…
Refer back to last week’s post about calculating the total number of sts you need based off of your gauge (remember, mine was 220).
Divide that number by 4 (220/4= 55 sts).
Then, add 2 to that number (55+2=57 sts).
If that number is even, add 1. If that number is odd, don’t change it.
This is the stitch count where you will stop knitting :)
Repeat Row 2 one last time, so that you are set up to work a RS row.
If you are working panels 1, 2, or 3…
break your yarn without binding off. Transfer your panel to a piece of scrap yarn or a stitch holder.
If you are working panel 4…
do not break your yarn. You will resume from right here next week.

I like to place all my panels on a spare cord for my circular needles, so they are ready to be knit together. If you do this, make sure the RS and WS face the same direction on all of your pieces to make next week super easy!
Here’s what you will need for the next post:
In the next post, we will be joining all 4 of our panels to knit the rest of the body. You will need:
your needles - again, circular are recommended but I will provide options for straight needles
a stitch marker, if you choose to join in the round
more yarn :)